This was the system and applications I used:
Hardware: AMD Athlon XP 2400+ (2 GHz)
512 MB RAM
Software: Windows XP
Apophysis 2.0
Terragen 0.9.19 registered
TerraFormer2 v1.4b
Adobe Photoshop 7.0
World Machine 0.99 (not used here, but can be used too)
TerraBrush 0.73 (not used here, but can be used too)
1. The Idea
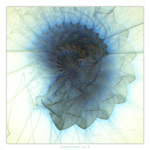
Before I explain the method I want to give a short introduction. The idea of using rendered images of fractals as terrains is not seen very often but not new at all. And of course, it is not my idea. But when I saw the really delicate and smooth renders of Apophysis I got the idea of using them as terrains. My first experiments disappointed me a little, because the terrains looked still too bumpy for my taste - even when I blurred or eroded the terrains in World Machine (a terrain editor). My picture “apoterra”
[image 1] is an example of that.
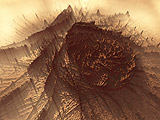
[image 1 - click to enlarge]
In a next step I wanted to simplify everything: No terrain editing and just an orthographic view of the terrain.
So I describe the basic and simple way here, that you may follow easily:
2. The Synthesis
2. 1. Rendering a Flame in Apophysis
First of all you need a nice Apophysis render. A good tutorial about getting started with Apophysis can be found HERE.
Maybe try the “Spiral Batch” to get some nicely twisted and centred forms (or, try something completely different!). When you have an interesting form, you chose a fitting gradient. You should take a smooth gradient that is rather dark and has only a few highlights. The background colour remains black.
Then, render a square image of 1024x1024 or 2048x2048 pixels. Be sure to have the JPG quality set to 100. The sample density I have set to 2000. Rendering time can vary strongly! My render took ca. 4 hours; other comparable images may take from
2
to 14 hours.
2.2. Converting to .bmp
Open the Apophysis image in Photoshop or a similar editor and convert it to a greyscale bitmap. Adjust the curves; but, avoid too strong contrast. Fields of pure black or white will give only flat plateaus or plains and interesting detail might be lost.
Save it as a square greyscale .bmp (24 bit!). [Image 2]
[image 2]
2.3. Converting to .ter
I just want to mention the possibility to import the .bmp file directly to Terragen with the plug-in “Firmament BMP Import”; but, this works only once per Terragen session.
So, I recommend conversion of the .bmp into a .ter file with TerraFormer2 (freeware).
2.4. The Viewpoint
Open Terragen. Then you open the .ter file. Do not change the measures of the terrain. The height range should be -300m to 300m (30m point spacing). So it is rather flat. You may also use the original terrain. Download it from HERE.
Then; check “Orthographic” in the camera settings and click “Auto Setup” for the "view width".
2.5. The Surface
This tutorial describes the changes of the default settings of Terragen – do not use a preloaded world file!
Open the “Surface Map” in the “Landscape” window. Push the sliders of “Bumpiness” and “Mimic Terrain” to the very left. Change the colour to a neutral grey (128-128-128). No further layers are needed. You see; it is all very simple!
2.6. The Atmosphere
The settings for the atmosphere are also very simple. It is basically the “glow effect” that gives some extra colour to the lower parts of the terrain.
First open the “Atmosphere” window. Then, turn the “Simple Haze to” 0% (ignore the half-height); “Atmosphere Blue” to 5%; half-height to 30.7m; and, set “Light Decay / Red” to 30% (no change to half-height).
Then, open the “Lighting Conditions” window. Set the “Sun Altitude” to 5; and, “Sun Heading” to 198 (or wherever you like). Under the “Background Lighting” check “Multi-directional Shadow Lighting”.
2.7. Rendering
Open the “Render Settings” window. Under “Anti Aliasing” and additionally check “Ultra”. Under “Options” / ”Colour Settings” set the "Gamma Correction" to 1,6.
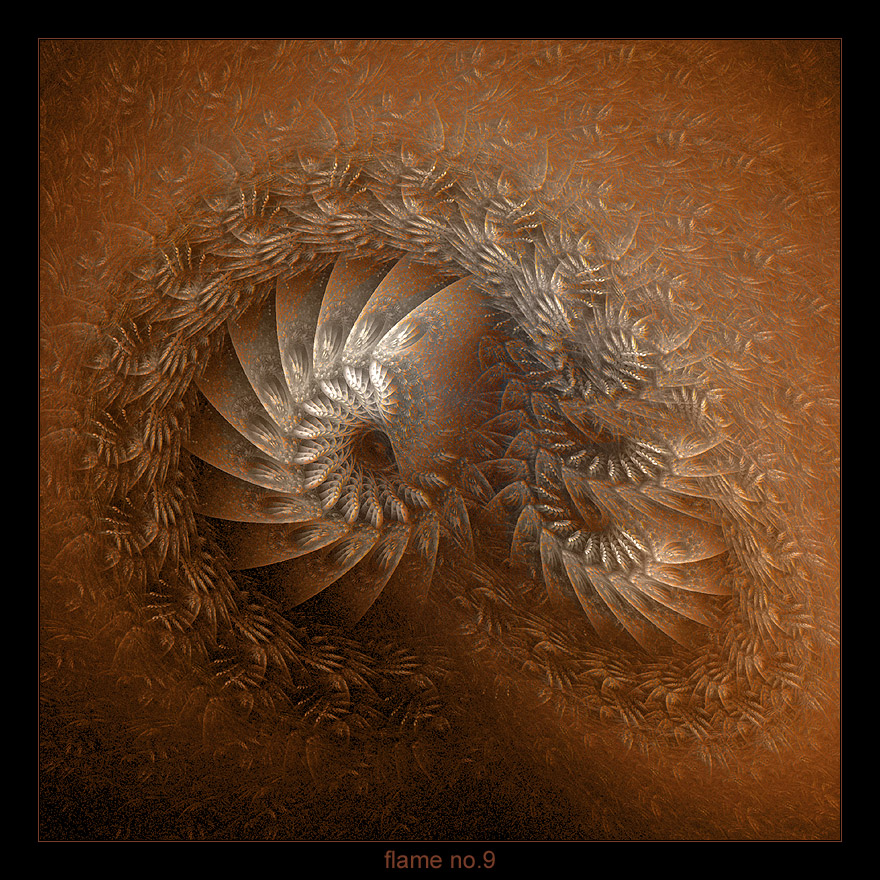
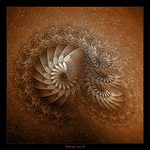
Under “Image” chose the size you want. The image “experiment no.4” [image 3] I rendered in a resolution 2400x2400.
Don’t forget to set the “detail” slider in the “Rendering Control” window to the right. Then, proceed to render! Rendering on my PC takes 2 – 3 hours for these kinds of images.
[image 3 - click to enlarge]
2.8. Postwork
Open Photoshop; or, a different graphics editor and resize your render to the screen size that you want. Sharpen it a little to preserve the impression of high detail. Maybe you want to adjust the curves or colours; frame it or not – you are ready!
Including the render times; the making of this image took me 10 hours.
3. Variations
This simple method can be varied in many ways of course:
3.1.Variations of the Terrain
First of all, one may think of different ways of blending an “Apophysis terrain” with other terrains by either directly in Terragen; or, with Terraformer2, TerraBrush or World Machine.
You may also explore which other operations of these editors can improve your terrain, as most fractal terrains look too bumpy for a “traditional” landscape render. I did not find a recommendable method yet. Eroding or glaciating may smooth your terrain; but, many interesting features might get lost.
3.2.Variations of the Viewpoint
The further variations I describe all start out from the “orthographic view”; or, at least from a bird’s-eye view. Of course it may pay out to try more earthbound views if the terrain is suitable for that purpose. My image “battlefield” is an example. It is made with the same terrain as “apoterra”.
3.3.Variations of the Surface
Of course you can use any surface you like. But in the most cases I only used a simple grey or even a white surface because they better reflect the colours of the atmosphere than dark colours. In the following example I used a simple rock surface (three layers); almost completely covered by a simple snow cover (one layer + two child layers).
3.4.Variations of the Atmosphere
The number of variations here is infinite! Starting out from the simple case the first step could be: Changing the colour values of all elements that affect the atmosphere. These are:
In the “Atmosphere” window: Simple Haze, Atmospheric Blue and Light Decay.
In the “Lighting Conditions” window: Colour of Sunlight; or, Base Sun Colour and Shadow Colour (Single Colour Shadow Lighting); or, if you check Multi-directional Shadow Lighting: Diffuse Sunlight, Light from Above and Reverse Light.
For a different terrain you might adjust the values for the glow-effect (Atmospheric Blue) and you can play with the altitude and intensity of the sun, etc.
I cannot name all settings that have an influence, so I give an example:
[image 4 - click to enlarge]
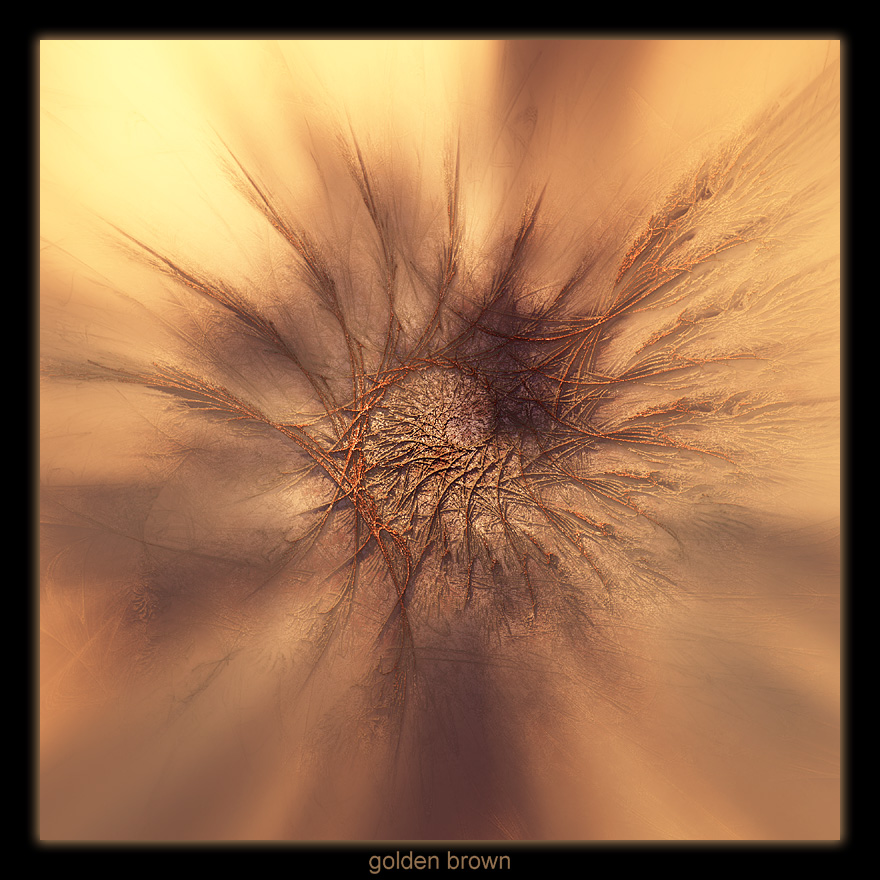
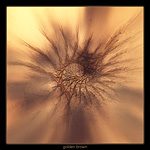
In the image “golden brown” [image 4] I used completely different atmosphere settings (no glow-effect!) that you might want to try as follows:
“Atmosphere” window:
Set the “Simple Haze” to 75%; half-height 115.4m; and, colour: 58-60-68. (The lower parts of the terrain are under the haze).
The “Atmospheric Blue” to 15%; half-height to 3444.3m; and, colour: 72-120-152. (These are quite normal settings).
The “Light Decay / Red” to 25%; half-height 5792.6m; and, colour: 240-152-80. (This is to give an overall warm orange light).
“Lighting Conditions” window:
All checkboxes “…Cast Shadows” are checked. You might add clouds later; that give interesting shadows on the terrain.
“Sun Heading”: -24, “Sun altitude”: 25 (Higher than before for more direct light on the terrain); and, “Sunlight Strength”: 250%
“Background light”: Check “Multi-directional…” and, “Shadow lightness” to 49%. Colour of “Diffuse Sunlight”: 76-52-104 (This is a blue tone, to break up a too monochromatic appearance of the image).
“Light from Above”: 27-40-65 (This is rather dark to avoid too light shadows)
“Reverse Light”: 168-0-8 (A dark red is added for some interesting colour to the shadows. Red is also one of the surface colours).
“Lighting of the Atmosphere”: Here you increase the “Glow Amount” to 220%. It makes the haze glow some more when lighted by the sunlight.
“Cloudscape” window:
“Generate clouds”: Push the slider one step towards “max”; and, set “Persistence” to 45 to Generate clouds!
“Sky Size”: 4000. “Altitude”: 9000m; “2D” checked; “Depth/Thickness”: 6; “Darkening”: 95%; “Density Contrast”: 4 and “Density Shift”: 20.
So we have thin clouds which still let some light passing through. This makes some nice shadows, half shadows and zones of glowing haze.
Rendering:
Do exactly as in the previous image. The only change is: Set the gamma correction to 1.0.
This render took only
2:36
hours.
3.5.Variations of the Postwork
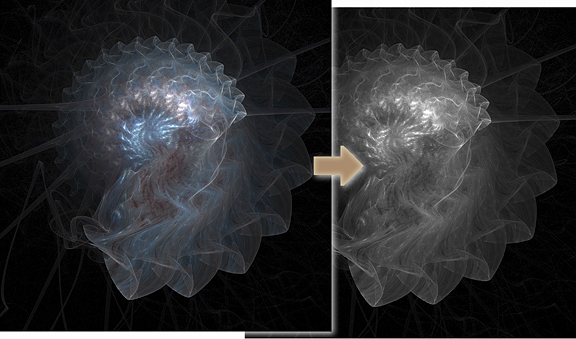
Of course you may treat your render as you like. One idea is to blend one or more layers of the Apophysis render with your Terragen render. Try this method, if you are not satisfied with your Terragen render; and, you may obtain interesting effects. It may not look like a Terragen render anymore; but, it is still more than just a simple flame. [image 05]
[image 5 - click to enlarge]
A big THANK YOU to Bob Choronzuk (aka choronr) for reviewing and correcting the text !
Have fun with this tutorial! Please feel free to show me your results or send me a mail! :-)
[mail]